
Leveraging Pins with Posit Connect
Leveraging Pins with Posit Connect Ryan Johnson, Data Science Advisor at Posit You might find this helpful if: * You have reports that need to be regularly updated so you want to schedule them to run with the newest data each week * You reuse data across multiple projects or pieces of content (Shiny app, Jupyter Notebooks, Quarto doc, etc.) * You’ve chased a CSV through a series of email exchanges, or had to decide between data-final.csv and data-final-final.csv * You haven’t heard of pins yet! For some workflows, a CSV file is the best choice for storing data. However, for the majority of cases, the data would do better if stored somewhere centrally accessible by multiple people where the latest version is always available. This is particularly true if that data is reused across multiple projects or pieces of content. With the pins package it’s easier than ever to have repeatable data. Timestamps: 0:17 - install the pins package and load into your environment 0:32 - register a board 0:59 - connecting to your Posit Connect instance from Posit Workbench or RStudio IDE 1:43 - define the Connect instance as your board 2:01 - pin the mtcars dataset to your Connect instance 2:38 - a pinned dataset on Posit Connect 2:50 - reading a pinned dataset Additional resources: * Example workflow that involves Quarto, pins, plumber API, vetiver and shiny: machine-learning-pipeline-with-vetiver-and-quarto/ * Connect User Guide - Pins for R: https://docs.posit.co/connect/user/pins/ * Connect User Guide - Pins for Python: https://docs.posit.co/connect/user/python-pins/ * 9 ways to use Posit Connect that you shouldn’t miss: https://posit.co/blog/9-ways-posit-connect/ Learn more: If you haven’t had a chance to try Posit Connect before or you’d like to learn how your team can better leverage pins, schedule a demo with our team to learn more! https://posit.co/schedule-a-call/?booking_calendar__c=RSC_Demo On the last Wednesday of every month, we host a Posit Team demo and Q&A session that is open to all. You can use this to add the event to your own calendar: pos.it/team-demo
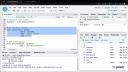
image: thumbnail.jpg
Transcript#
This transcript was generated automatically and may contain errors.
In this video, we're going to go through the process of pinning a dataset to Posit Connect using the pins package. So over here on the left hand side, we have a pins demo R script, and we're going to walk through all these steps.
The first thing we'll do is install the pins package and then load the pins package into our environment. So I'll highlight these lines of code and I'll hit run.
Defining a board
Now in order to use pins, you first have to define a board. And so for this workflow, we're going to use Posit Connect as our board. The first thing we need to do is register our board. So the easiest way to do that is to go to tools, global options and select publishing. So the top of my screen, I'll go to tools. All the way at the bottom, we have global options. And towards the bottom, we have publishing.
Unfortunately, I do not have any Posit Connect instances registered. So we're going to connect to a new one. So I'll click connect here in the top right. We're going to choose Posit Connect. And here is where you want to provide the URL of your Connect instance. I'll select next. And we get this pop up menu to connect to R. That all looks good. We'll hit connect.
I can close out of this and then connect account. All right, so we're now connected to our instance of Posit Connect. I can apply these changes and hit OK.
All right, so now that we've registered our Posit Connect instance, we first need to define this Connect instance as our board. And to do that, we're going to use the board connect function from the pins package. And we're going to call this my board. So let me run this line of code.
And you can see at the bottom, connecting to Posit Connect. And there's the URL for my Connect instance.
Pinning a dataset
And now we can actually pin the data set. So in this example, we're going to use the pin write function from the pins package. And we're going to pin the mtcars data set. We're going to pin it to my Connect instance, which we registered in the previous step. We're going to call it mtcars data set. You can call it whatever you want. And we're going to save this pin as a CSV file. So let's highlight all this. We'll hit Run.
At the bottom of the screen, you can see writing to pin Ryan. That's me, mtcars data set. And now we can actually switch over to Posit Connect. And I can show you what a pinned data set looks like.
So here's the pinned data set, the mtcars data set. You can actually get a snippet of what the data set looks like right here. And you can actually scroll across. But most importantly, with pins, you want to know how to pull this pin into your own workflow, into your own script, whatever you're developing. And it provides the code on how to do that.
Reading a pinned dataset
So we're going to take this code. We're going to come back to Posit Workbench, the RStudio IDE within Posit Workbench here. And we're going to read in that pin data set. So we'll use the pin read function from the pins package. We're going to, again, let pins know that this is the board I want to use. And I'm going to pull in this pin. That's my name, the mtcars data set. So let's run that.
And then you'll see here in my console, here is the printed out pinned mtcars data set. And that is how you pin a data set to Posit Connect.
